Grout Cleaner
Grout Cleaner: Clean It Or Renew It?
Problematic Grout
Let’s think about this for a second, after cleaning and scrub the bathroom or your kitchen, never felt like still looks like old and dirty or let just say it like not perfectly cleaned? Grout can be a headache! With the passage of time, humidity and dirt accumulation on the grout turn it darken or even makes the tiles fall out. So, it never looks the same again.
I want to clarify about the importance of clean this out and find the best way to do it. First, we need to evaluate the damage of the grout, is it seems dark? then this means is not only dust but mold is present too.
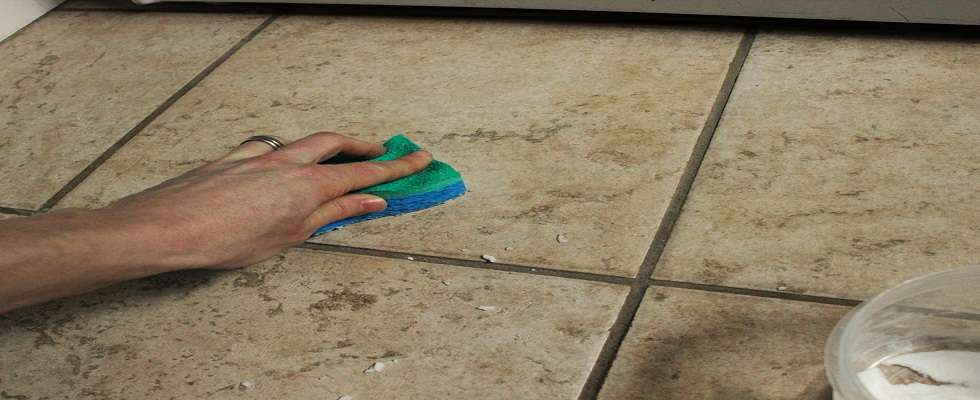
Cleaning It
A quick, cheap and common option is to clean it. This will proportionate a good appearance but not as good as the first day of course, if you are truly looking to perfection you should completely renew it. It is important to mention that you can choose this option several times but you must not abuse of it because can cause a wear or an irreparable damage in your grouts.
The best way to clean it is to use some specific products for this function, this will show off better results. Personally, I suggest commercial cleaning products, specifically household ones.
However, in the absence of specific products you can use homemade mixes which can bring you similar results, although the effectiveness possibly will not be the same. For this you can use a mix of water and any alkaline detergent, baking soda and bleach, for better results you can use a bristle brush.
Renewing It
Otherwise if you are looking for an optimum appearance you will not have other option than renew it. To change the grout, we can go to the easy way and call to the experts, this will guarantee an excellent job, but we can go for the cheaper way and do it yourself. This option is also viable since is not complicate and do not require high knowledge or technical abilities. We only need time to do it.
Take a note of the material you will need; punch or spatula, mortar, water, rubber or rubber trowel and a sponge. So, to explain it step by step, I drop you the next quick guide:
- Once you retired the old grout, cleaned the dust and the rest of imperfection because is important that the tiles and grout be dry and clean before start applying the new material.
- Using the mortar, mix the grout with water (the portions usually are printed in the package) until you have a homogenous mass. This can be mixed manually or with a electric beater.
- Using the rubber trowel, we will fill all the grouts. You can get this by extending the product diagonally and pressing to fill the grouts.
- Is important to pressing correctly so the mix can fill the little holes, in corners or places of difficult access we can do it helping us with a spatula. We should not be worry about to stain the tiles. At the end, we will clean the tiles in a very easy way.
- Once you filled the grouts we should eliminate the excess with the trowel and wait for 15 to 20 minutes.
- Once the 15 to 20 minutes past (you will notice the loss of shine in the morter, this means the mix started to hardening) we should ending using the moistened sponge through the tiles to clean it.
- Finally, we let it dry until completely hardening.
- Last but not least, we should do a final cleaning with only water and a clean rag.
To Consider:
- On porous or rough tiles before grouting should be protected with a primer to prevent staining and to facilitate cleaning.
- In very problematic areas due to contact with water, high humidity, dust, etc. You can choose to fill the grout sealer reviews with silicone. The impermeability of the product will not absorb dust and save maintenance.
Now you have at least two options to keep your bathrooms and kitchen like the first day!